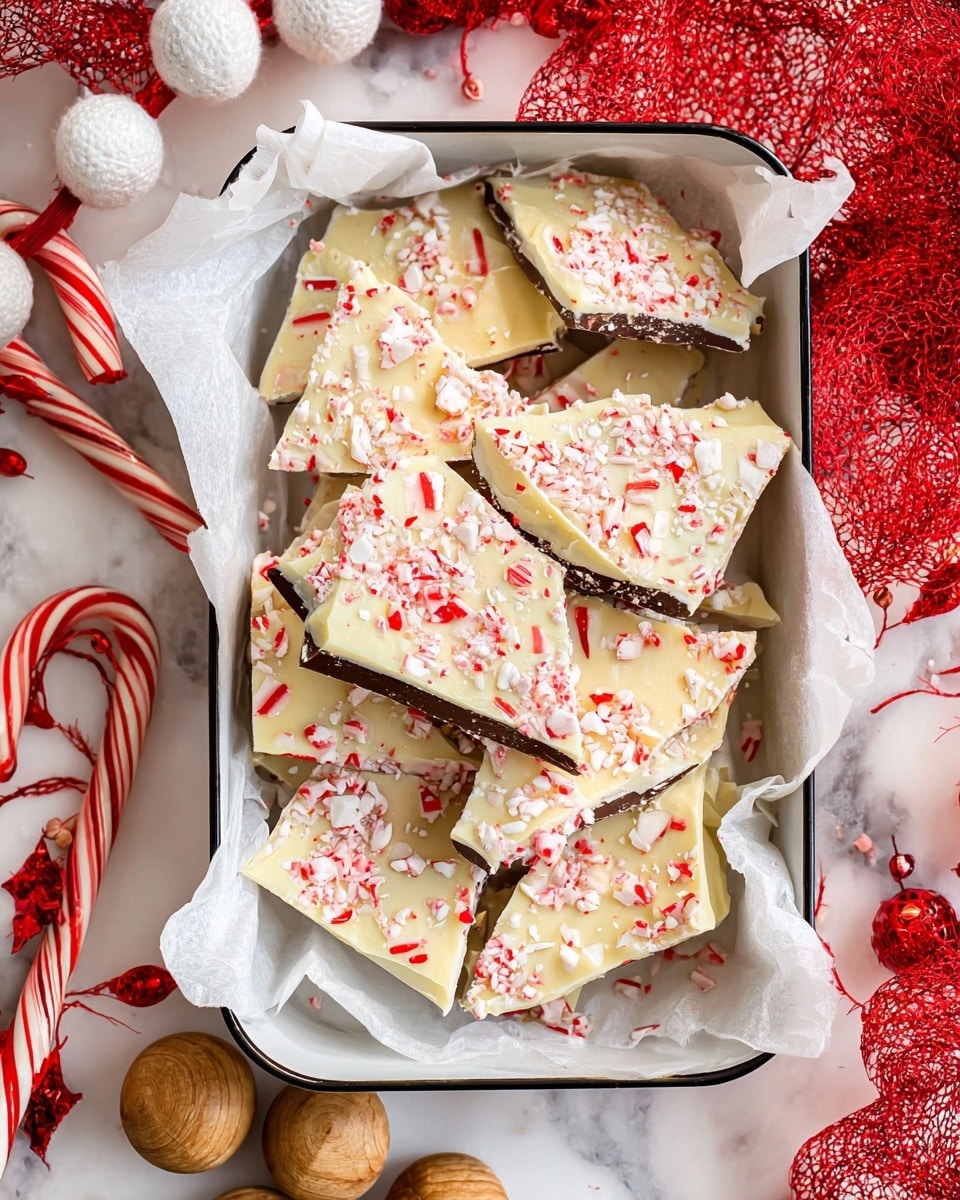
If you’re searching for that perfect holiday treat that’s easy yet irresistibly delightful, look no further than this Festive No-Bake Peppermint Bark Recipe. It’s a timeless Christmas candy that combines rich semi-sweet chocolate with smooth white chocolate, topped off with a crispy crash of peppermint candies. This recipe brings together the perfect balance of creamy sweetness and refreshing peppermint zing in a no-fuss, no-bake format that even beginners can master. Trust me, once you experience that first bite, you’ll be hooked, whether you’re gifting it, sharing it at a party, or simply enjoying it by the fire.
Ingredients You’ll Need
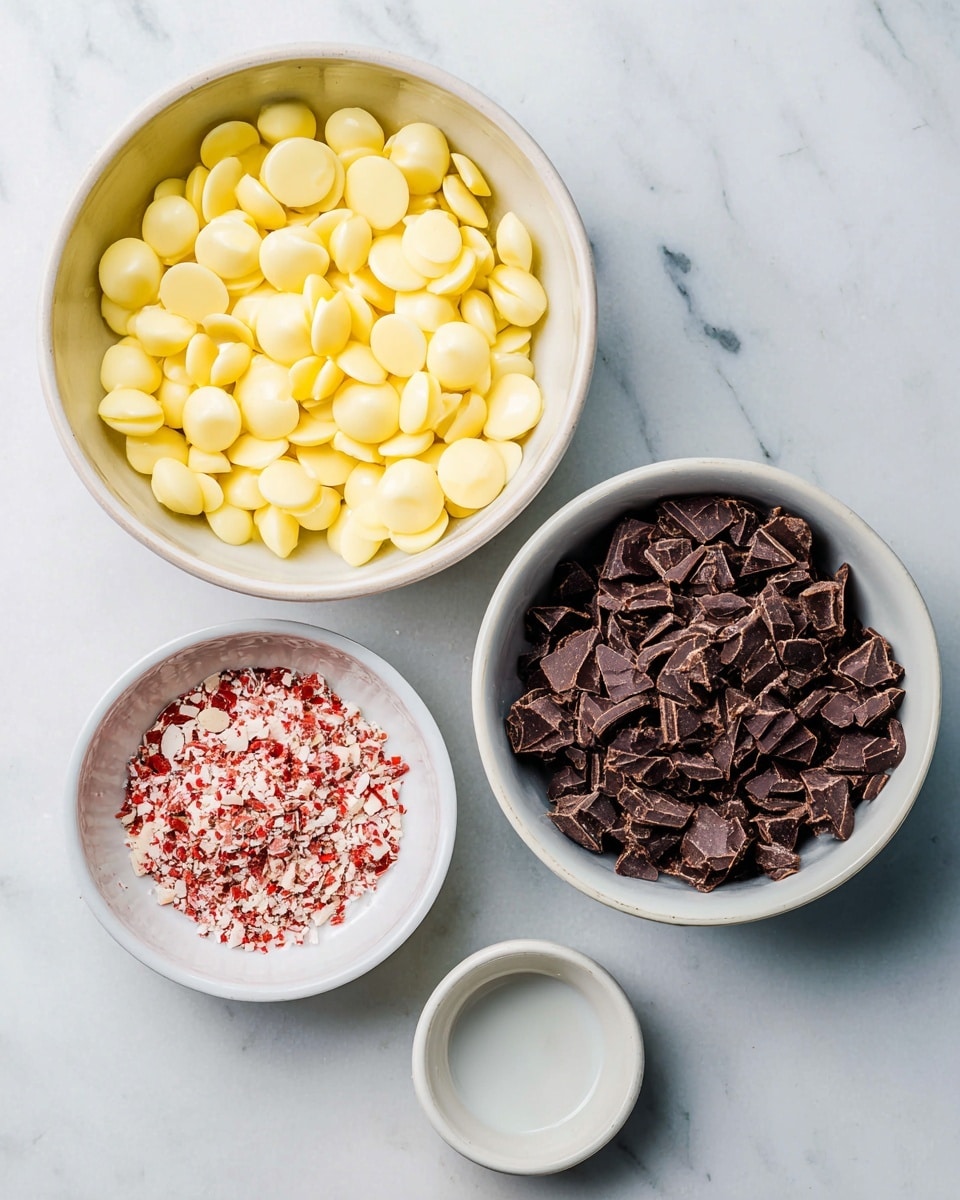
Keeping the ingredient list short and sweet is one of the joys of this Festive No-Bake Peppermint Bark Recipe. Each component plays a starring role in delivering a simple yet magical combination of creamy, minty goodness and crunchy texture that defines peppermint bark.
- 12 ounces semi-sweet chocolate chips or chopped bar: This creates a luscious, slightly bitter chocolate base that contrasts beautifully with the white chocolate.
- 16 ounces white chocolate chips or chopped bar: The creamy and sweet white chocolate layer is key for that classic peppermint bark look and taste.
- 1 teaspoon peppermint extract (NOT peppermint oil): Adds the authentic, refreshing peppermint flavor without overpowering the chocolate.
- ½ cup crushed peppermint candies (about 12 candies or 3 candy canes): These add a satisfying crunch and festive red-and-white color that make this treat visually irresistible.
How to Make Festive No-Bake Peppermint Bark Recipe
Step 1: Prepare Your Pan
Start by lining a 9×13-inch pan with parchment paper and giving it a good spray with cooking spray. This little step ensures your peppermint bark will pop right out once it’s set, saving you precious time and preventing the heartbreak of broken edges. Trust me, this prep makes the whole process smoother.
Step 2: Melt the Semi-Sweet Chocolate
Place the semi-sweet chocolate chips in a large, microwave-safe bowl. Microwave on high for 30 seconds, then stir. Continue heating in 10 to 15-second bursts, stirring after each, until mostly melted and smoothly combined. The trick here is patience — overheating will burn the chocolate and ruin the whole batch. If you prefer, a double boiler can be gentler and just as effective.
Step 3: Spread and Set the First Layer
Pour the melted semi-sweet chocolate into your prepared pan and smooth it out with a spatula. Let it set at room temperature until it hardens almost completely. This stage is crucial for ensuring the layers stick together later without separating when you cut the bark. Avoid popping it in the fridge to prevent condensation, which can mess with the texture.
Step 4: Melt the White Chocolate and Add Peppermint
Next, melt your white chocolate in the same careful way — 30 seconds on high power, stirring often, followed by short bursts until smooth. Once melted, fold in the peppermint extract carefully, making sure it’s evenly distributed but not too strong. This delicate step brings the signature minty brightness to your bark.
Step 5: Combine Layers and Sprinkle Peppermint
Pour the white chocolate mixture over the semi-sweet layer, spreading gently so that you keep as much of that rich contrast as possible. Immediately sprinkle the crushed peppermint candies evenly on top for a festive crunch and irresistible look. Let the entire bark set at room temperature until fully hardened before moving on.
Step 6: Slice and Enjoy
Once hardened, peel the bark from the pan and cut or break it into bite-sized pieces. Using a sharp knife makes for cleaner edges, but breaking it by hand lends a beautiful rustic charm — either way tastes divine!
How to Serve Festive No-Bake Peppermint Bark Recipe
Garnishes
To elevate your peppermint bark even further, consider dusting a little edible glitter or a sprinkle of finely crushed candy canes on top just before serving. This adds sparkle and extra peppermint punch that makes every piece feel like a special gift.
Side Dishes
Peppermint bark pairs wonderfully with warm drinks such as hot cocoa or spiced coffee. Serving a few pieces alongside a cozy mug makes for an extra festive holiday treat station or dessert table.
Creative Ways to Present
Wrap chunks of peppermint bark in festive cellophane bags tied with ribbon for charming homemade gifts. Or arrange the bark on decorative platters with holiday sprigs for a centerpiece that’s both beautiful and delicious. You can also layer the bark pieces in mason jars for a delightful edible gift that looks almost too pretty to eat.
Make Ahead and Storage
Storing Leftovers
You’ll be thrilled to know that this peppermint bark keeps beautifully at room temperature in an airtight container for up to a month. Just store it away from direct heat or sunlight to maintain that perfect snap and peppermint freshness. No fridge necessary!
Freezing
If you want to keep your peppermint bark longer, freezing is a great option. Wrap it well in plastic wrap and place it in an airtight bag or container. It will easily last 4 to 6 months, making it perfect to prepare well ahead of the busy holiday season.
Reheating
Since peppermint bark is best enjoyed cold or at room temperature, avoid reheating in the microwave or oven, as it can cause the chocolate to bloom or lose its delightful snap. If you need to soften it slightly, let it sit at room temperature for a bit and then enjoy!
FAQs
Can I use peppermint oil instead of peppermint extract?
Peppermint oil is much more concentrated and can impart a bitter or harsh taste, so it’s best to stick with peppermint extract for the smooth, bright flavor this recipe calls for. One teaspoon of extract delivers just the right touch.
Is it possible to substitute the white chocolate?
High-quality white chocolate is recommended for best texture and flavor results. Avoid white chocolate-flavored coatings or wafers, as they tend to be waxy and don’t set properly like true white chocolate.
Do I have to crush my own peppermint candies?
While store-bought crushed peppermint candies save time and ensure even size, crushing your own candy canes is perfectly fine. Place them in a sealed bag and crush gently with a rolling pin to avoid overly fine crumbs or tearing the bag.
Can I make this recipe vegan or dairy-free?
To make a dairy-free version, use semi-sweet and white chocolates labeled vegan or dairy-free, and ensure peppermint extract does not contain any animal-derived ingredients. The peppermint candies should also be checked for non-vegan ingredients.
What causes the layers to separate when cutting the bark?
Separation happens if the first chocolate layer is too soft or if the bark is refrigerated causing condensation. Ensuring the semi-sweet layer is mostly set before pouring the white chocolate and avoiding refrigeration can keep layers beautifully adhered.
Final Thoughts
There is something truly joyful about making and sharing this Festive No-Bake Peppermint Bark Recipe. Between its effortless preparation, delightful balance of chocolate and peppermint, and beautiful presentation, it’s a holiday favorite you’ll come back to year after year. So grab your chocolate, crush those peppermint candies, and whip up a batch to spread smiles and festive cheer in your home or as thoughtful gifts. You’re going to love every delicious bite!
Print
Festive No-Bake Peppermint Bark Recipe
- Total Time: 13 minutes
- Yield: 36 servings
Description
This no-bake peppermint bark recipe is a festive holiday treat made with layers of semi-sweet and white chocolate, infused with peppermint extract, and topped with crushed peppermint candies. Perfect for gifting, holiday parties, or cookie exchanges, this classic candy is easy to prepare and can be made ahead of time.
Ingredients
Semi-Sweet Chocolate Layer
- 12 ounces semi-sweet chocolate chips or finely chopped bar of chocolate
White Chocolate Layer
- 16 ounces white chocolate chips or chopped bar of chocolate
- 1 teaspoon peppermint extract (NOT peppermint oil)
Topping
- ½ cup crushed peppermint candies (about 12 peppermint candies or 3 candy canes, crushed)
Instructions
- Prepare Pan: Line a 9×13-inch pan with parchment paper and spray well with cooking spray; set aside.
- Melt Semi-Sweet Chocolate: Place the semi-sweet chocolate chips into a large microwave-safe bowl. Heat on high for 30 seconds, then stir. Continue heating in 10 to 15-second intervals, stirring after each, until the chocolate is about 80% melted and can be stirred smooth without overheating to avoid burning.
- Spread Semi-Sweet Chocolate: Pour the melted semi-sweet chocolate into the prepared pan, smoothing it evenly with a spatula or offset spatula. Allow it to set up at room temperature until it is almost fully hardened but still slightly tacky, which helps layers stick together.
- Melt White Chocolate: In a separate large microwave-safe bowl, heat the white chocolate chips following the same process: 30 seconds on high, stirring, then 10-15 second increments until smooth. Avoid overheating.
- Add Peppermint Extract: Stir the peppermint extract into the melted white chocolate until well combined.
- Layer White Chocolate: Pour the white chocolate evenly over the semi-sweet chocolate layer in the pan.
- Add Topping: Sprinkle the crushed peppermint candies evenly over the white chocolate layer.
- Set and Cut: Let the bark set at room temperature until completely hardened. Once set, slice or break into pieces using a sharp knife or by hand as desired.
- Storage: Store peppermint bark in an airtight container at room temperature for up to one month. For longer storage, freeze for 4 to 6 months.
Notes
- Use high-quality chocolate chips or chopped bars that melt smoothly. Ghirardelli semi-sweet and white chocolate chips are recommended for consistent smooth melting and great flavor.
- For chopped chocolate bars, Trader Joe’s Dark Chocolate pound bar is excellent for semi-sweet chocolate. Lindt White Chocolate is a good choice for white chocolate as Trader Joe’s doesn’t carry white chocolate bars.
- Store-bought crushed peppermint candies are preferred for convenience, but if crushing your own, place candies in a sealed zip-top bag and gently crush with a rolling pin without damaging the bag.
- Do not refrigerate or freeze immediately during setting as moisture condensation can cause layers to separate.
- Prep Time: 10 minutes
- Cook Time: 3 minutes
- Category: Candy
- Method: No-Cook
- Cuisine: American

