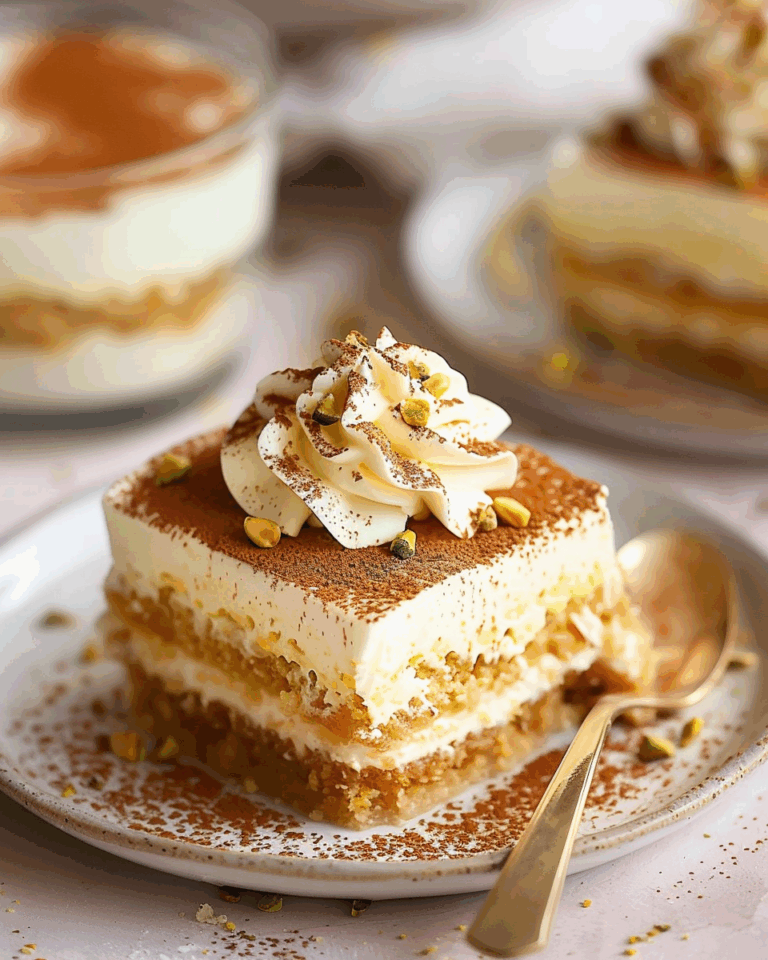
If you have a craving for something luscious yet refreshingly light, this No Bake Espresso Cheesecake Recipe is your goo-to dessert. Combining the rich boldness of espresso with creamy, dreamy textures, this cheesecake is an absolute game-changer. It’s incredibly simple to put together, needing no oven at all, making it perfect for warm days or when you just want to relax without too much fuss. From the buttery Oreo base infused with instant espresso to the silky espresso-flavored filling crowned with delicate chocolate shavings, every bite is a delightful celebration of flavors. Trust me, once you try this dessert, it will quickly become a favorite treat everyone will ask for again and again.
Ingredients You’ll Need
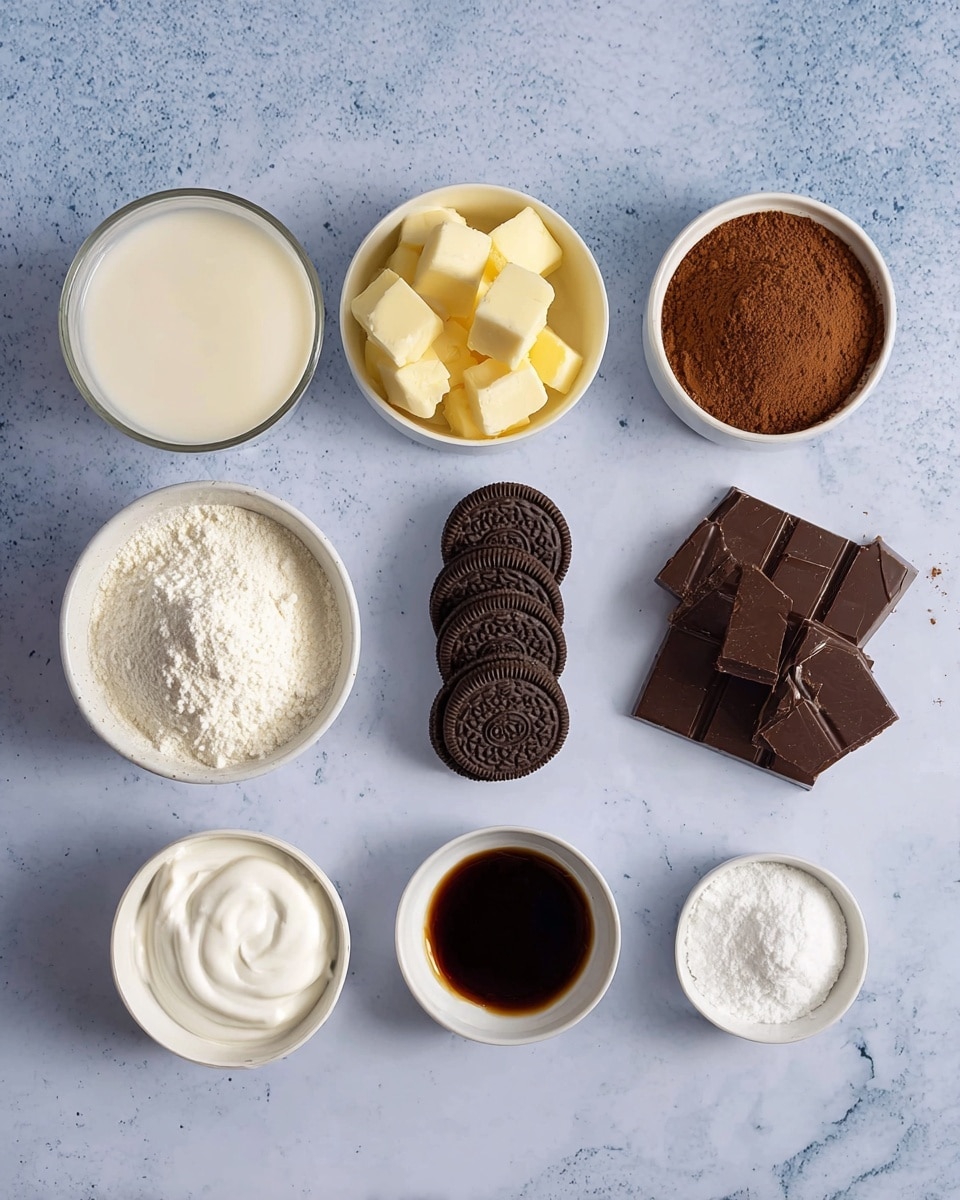
Every ingredient in this recipe is thoughtfully chosen to deliver the perfect balance of taste, texture, and that unmistakable espresso kick. Simple yet essential, these components come together to create a cheesecake that’s irresistibly smooth and indulgent.
- 300g Oreo cookies, just the biscuit: Provides a crunchy, chocolaty base that perfectly complements the espresso.
- 150g unsalted butter, melted: Binds the cookie crumbs together with a rich, buttery flavor.
- 6g instant espresso powder (for base): Infuses the biscuit base lightly with espresso aroma.
- 650g cream cheese: The creamy heart of the cheesecake that lends smoothness and tanginess.
- 5ml vanilla paste: Adds a sweet, mellow depth to the filling.
- 75g icing sugar: Sweetens the filling delicately without overpowering the espresso.
- 12g instant espresso powder (for filling): The essential espresso punch that defines the cheesecake.
- 420ml heavy (double) cream: Whipped into soft peaks to make the filling airy and light.
- 125ml double cream (for decoration): For a luscious, piped cloud topping.
- 2g instant coffee powder (for decoration): Enhances the intensity of espresso flavor on top.
- 15g icing sugar (for decoration): Sweetens the cream topping.
- 15g cocoa powder: Dust over the decoration for a beautiful, chocolatey finish.
How to Make No Bake Espresso Cheesecake Recipe
Step 1: Prepare the Biscuit Base
Start by blitzing the Oreo biscuits in a food processor until they become fine crumbs. Add your instant espresso powder right into the mix for that subtle coffee note. While the processor is still running, slowly stream in the melted butter to combine everything into a uniform crumb. This buttery, espresso-infused base will set the stage for the creamy layers above. Press the mixture evenly into the bottom of a 23cm springform pan lined with greaseproof paper and pop it into the fridge to chill and firm up for about 10 minutes.
Step 2: Whip Up the Espresso Cheesecake Filling
In a large bowl, beat the cream cheese together with the vanilla paste until smooth and creamy. Gradually add the icing sugar and instant espresso powder, mixing continuously until everything is well combined. In a separate bowl, whip the heavy cream to soft peaks — this is what will make your filling light and airy. Gently fold the whipped cream into the cream cheese mixture, taking care not to deflate the air you’ve just whipped in. This luscious filling will bring that signature espresso cheesecake experience to life.
Step 3: Assemble and Chill
Remove the biscuit base from the fridge and spread the espresso cheesecake filling evenly over it. To eliminate any air bubbles, gently drop the springform pan onto your kitchen counter a few times. This ensures your cheesecake is smooth and even. Cover and refrigerate for at least 6 hours, but preferably overnight. This waiting time allows all those flavors to mingle and the cheesecake to set beautifully without ever needing heat.
Step 4: Decorate with Espresso Cream and Cocoa
For the finishing touch, whisk the double cream, instant coffee powder, and icing sugar together until soft peaks form. Transfer this glossy coffee cream to a piping bag and decorate the top of your cheesecake as you like – swirls, rosettes, or dollops all work beautifully. Finish by dusting cocoa powder over the top. This decoration not only adds elegance but also layers of flavor and texture, making your dessert a true feast for both eyes and taste buds.
How to Serve No Bake Espresso Cheesecake Recipe

Garnishes
Classic chocolate shavings or finely grated dark chocolate elevate the look and richness of your cheesecake. A light dusting of espresso powder can also intensify the coffee flavor without being overwhelming. For an extra flair, freshly whipped cream dollops sprinkled with crushed espresso beans create a delightful texture contrast and an irresistible aroma.
Side Dishes
Serve slices alongside a simple berry compote or fresh raspberries to add a touch of fruity brightness that cuts through the richness. A small espresso or coffee pairing naturally complements the flavors of the cheesecake, turning dessert into a complete café-worthy experience at home.
Creative Ways to Present
Try serving individual portions in clear glasses layered with crushed Oreos and espresso cream for a stylish cheesecake parfait. Alternatively, garnish with edible gold leaf or coffee-flavored brittle shards for special occasions. Don’t hesitate to experiment — the No Bake Espresso Cheesecake Recipe is versatile and visually stunning in any form you choose.
Make Ahead and Storage
Storing Leftovers
Keep your cheesecake in an airtight container or covered tightly with plastic wrap in the fridge. It should remain fresh and delicious for up to 3 days, making it perfect for preparing in advance for gatherings or anytime indulgence.
Freezing
If you want to store it longer, the cheesecake freezes beautifully. Wrap the entire cheesecake or individual slices tightly in plastic wrap and then in foil or a freezer bag. It will keep well for up to one month. Thaw in the refrigerator overnight before serving to retain that perfect creamy texture.
Reheating
This cheesecake is best enjoyed chilled, so there’s really no need to reheat. Just letting it sit at room temperature for 10–15 minutes before serving can soften the texture slightly and enhance the flavor to its fullest.
FAQs
Can I use regular coffee instead of instant espresso powder in the No Bake Espresso Cheesecake Recipe?
While regular brewed coffee has a milder flavor and more liquid, instant espresso powder offers concentrated espresso taste without adding moisture, crucial for keeping your cheesecake texture just right. So, it’s best to stick with instant espresso powder for authentic flavor and proper consistency.
Is it possible to make this cheesecake gluten-free?
Absolutely! Swap out the Oreo cookies for gluten-free chocolate cookies or biscuits, and ensure your other ingredients are gluten-free. This simple substitution keeps all the rich flavors intact while catering to dietary needs.
Can I substitute cream cheese with mascarpone or ricotta?
You can try mascarpone for a slightly sweeter, creamier texture, but ricotta is a bit grainier and won’t produce the same smoothness. Cream cheese remains the best choice for that classic cheesecake feel, especially in this no bake recipe.
How long can I keep the No Bake Espresso Cheesecake Recipe in the fridge before it goes bad?
Stored properly in the refrigerator, this cheesecake will remain fresh for around 3 days. Beyond that, the texture and flavor might start to degrade, so for best taste and safety, enjoy within that time frame.
Can I add liqueur like Kahlua to enhance the espresso flavor?
Absolutely! A tablespoon or two of coffee liqueur blended into the filling adds a lovely depth and adult twist to this dessert. Just be mindful not to add too much liquid so your cheesecake sets properly.
Final Thoughts
This No Bake Espresso Cheesecake Recipe is hands down a winner in the dessert world — effortless to make, deeply satisfying in flavor, and beautifully elegant in appearance. Whether you’re impressing friends at a dinner party or simply treating yourself after a long day, this cheesecake offers a wonderful blend of coffee and cream that feels both comforting and gourmet. I can’t wait for you to try it and add your own personal twists. Happy baking, or rather, happy no baking!
Print
No Bake Espresso Cheesecake Recipe
- Total Time: 6 hours 20 minutes
- Yield: 12 portions
- Diet: Vegetarian
Description
This No Bake Espresso Cheesecake is a rich and creamy dessert perfect for coffee lovers. Featuring a crunchy Oreo biscuit base infused with instant espresso powder and a smooth, velvety espresso-flavored cheesecake filling, topped with a decorative espresso whipped cream and cocoa powder, this dessert requires no baking and comes together in under 30 minutes plus chilling time.
Ingredients
Biscuit Base
- 300g Oreo cookies, just the biscuit
- 150g unsalted butter, melted
- 6g instant espresso powder
Espresso Cheesecake Filling
- 650g cream cheese
- 5ml vanilla paste
- 75g icing sugar
- 12g instant espresso powder
- 420ml heavy (double) cream
Decoration
- 125ml double cream
- 2g instant coffee powder
- 15g icing sugar
- 15g cocoa powder
Instructions
- Prepare the Biscuit Base: Place the Oreo cookie biscuits into a food processor and blitz until they form fine crumbs. Add the instant espresso powder and while the processor is running, pour in the melted butter, blending for about 15 seconds until fully combined. Stop the processor once the mixture is uniform.
- Form the Base in the Pan: Line the base of a 23cm (9 inch) springform pan with greaseproof paper. Secure the springform ring around the papered base. Pour the cookie crumb mixture into the pan and press evenly using the bottom of a large glass. Chill in the refrigerator for around 10 minutes to firm up.
- Make the Espresso Cheesecake Filling: In a mixing bowl, beat the cream cheese and vanilla paste using a stand mixer on medium speed until smooth. Gradually add the icing sugar and instant espresso powder while continuing to mix until fully incorporated.
- Whip the Cream: In a separate bowl, whisk the heavy (double) cream until soft peaks form. Gently fold the whipped cream into the cream cheese mixture until completely blended and smooth.
- Assemble the Cheesecake: Remove the biscuit base from the fridge and pour the espresso cheesecake filling evenly over it. Carefully drop the pan onto the kitchen counter 5 to 10 times to release any trapped air bubbles.
- Chill to Set: Place the cheesecake in the refrigerator for at least 6 hours, preferably overnight, to allow it to fully set and develop flavors.
- Remove from Pan: After chilling, loosen the cheesecake from the pan sides using a kitchen blowtorch or a cloth dipped in hot water to gently warm the sides. Remove the springform ring and peel away the greaseproof paper.
- Prepare the Decoration: Whisk together the double cream, instant coffee powder, and icing sugar in a bowl until soft peaks form. Fill a piping bag with this mixture and pipe decorative swirls onto the cheesecake surface. Finish by dusting with cocoa powder.
- Serve and Enjoy: Slice the cheesecake into 12 portions and serve chilled for the best creamy and espresso-infused experience.
Notes
- Using Oreo biscuits without cream filling results in a firmer biscuit base.
- Instant espresso powder enhances the coffee flavor without adding liquid.
- Allow the cheesecake to chill overnight for optimal texture and flavor.
- A kitchen blowtorch is helpful to loosen the springform sides but can be substituted with a hot damp cloth.
- Use a stand mixer or electric mixer for smoother cream cheese blending and whipped cream.
- Ensure soft peaks are achieved in the whipped cream for a light and fluffy filling.
- Prep Time: 20 minutes
- Cook Time: 0 minutes
- Category: Dessert
- Method: No-Cook
- Cuisine: American

